Wednesday, December 23, 2009

Registering for Triangle Tennis Trust tournament (TTT)

MLC has developed an application to manage the registrations for the upcoming tournament by Triangle Tennis trust in Chennai. The application has been developed using Microsoft's Silverlight technology. The current blog post will guide you on how to go about the process of registration.

Step I: Install Silverlight

  1. Go to the registration website http://mlc.org.in

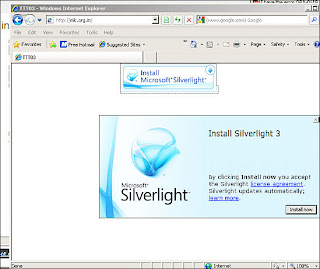
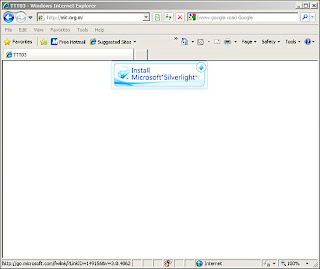
  2. If Microsoft's Silverlight is not installed on your system, the browser will prompt you to install it. (View screen shot)
    (If Silverlight is already installed ignore the subsequent steps and move to Step II of registration)

  3. Install Silverlight
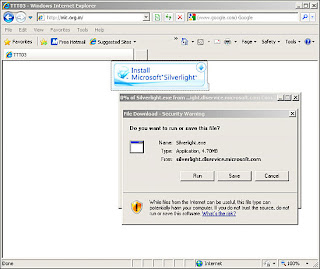
  4. You will be prompted to Run or Save the installer file. Click on Save and save the to a local folder. In case, you have subsequent problems with installation you can utilise this file later.


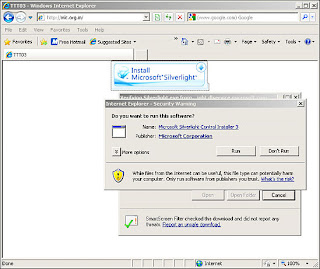
  5. Run the downloaded file.


  6. Install Silverlight to your computer.


  7. The browser will refresh automatically to launch the website. If it does not, then close your browser and try to log on to the website http://mlc.org.in again.
Step II: Register
You should see a screen with 2 buttons on the main page as follows:


Click on "New Registration" to register.
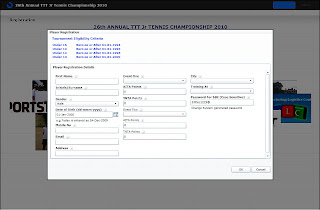

For fields like Date of Birth, click the box with an icon mentioning "15" which will pop-up a small window for date selection. To change the year, click on the top of that window which reads the date, month (For e.g. January, 2000). Select the appropriate year and click 'OK'.

Step III: View Registration
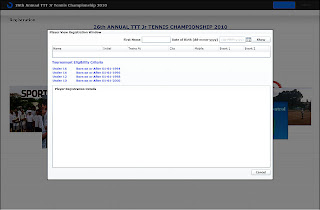
To view your registration details, click on 'View Registration' on the main screen. On the subsequent screen, provide your first name, Date of Birth and click on 'Show' to view your details.

Note: The application has been tested on the following browsers.

  1. Internet Explorer 8

  2. Opera (Version 10 and above)

  3. Safari

  4. Firefox (Version 3.5 and above)

  5. Chrome


For any further support, use our forum - Click here for the forum

Recovering Database from Ora 01194 error

Problem:
The Oracle Database (10.2.0.4) instance would start, database would get mounted, but it would not shift to open state prompting an error:

ORA-01194: file 1 needs more recovery to be consistent
ORA-01110: data file 1: [Database File Location]


Actions performed before problem

  1. Attempt was being made to put the database into Archive mode. But the command "alter database archivelog;" would give an error mentioning some database file was corrupt. Recovery had to be performed on the file. (Error number was not noted)

  2. Windows update installation required a restart of the Server. Restart was done without explicitly shutting the Oracle Database down.

  3. To put the database in Archive Mode, Shutdown abort was done once. (Instead of normal shutdown or shutdown immediate)


Actions performed to recover database
  • We first tried,

    recover database until cancel;

    The command then suggested certain archive files in the archive destination mentioned in our init.ora. However, since Archiving was never turned on earlier, those files did not exist. The command failed with an OS Error which said that the file was not found.


  • We removed the archive log parameters from init.ora and tried the same command

    recover database until cancel;

    The command suggested Archive files in the folder [Oracle-Home]/RDBMS which did not exist either.

  • Recover Database from backup control file was attempted

    recover database using backup controlfile until cancel;

    But we kept getting the same error as we did not have any archive log file.

  • In all the above cases, we could not open the database using command.

    alter database open resetlogs;

    as it gave the error that the SYSTEM.DBF still needed more recovery.
  • We tried searching Oracle's Metalink support for the problem and then tried to ignore the suggestions made by recovery. Type CANCEL when file is suggested. Even that failed.

  • We finally decided to point to the current redo log files of the database to check if the database could be recovered and that worked.

    recover database using backup controlfile until cancel;

    Oracle suggests filename. Do not click enter, instead type the location of the redo log file. Starting from Redo log file 1, then 2 and then the 3rd until all recovery is complete.
    Database recovered.

  • Tuesday, December 22, 2009

    Automated Oracle Backup

    Running an Oracle database for your customer comes along with the responsibility of maintaining regular backups of the database. Some of our clients do not have dedicated system personnel to take the backups for our database. In such cases, we have to deploy some automated plans that will ensure minimal downtime to resuscitate a database.

    The automation is very simple. We just created a batch script to perform all the required operations and then use the Task Scheduler to run the backup every morning at 6 a.m when system is not being used.

    The jobs performed in the batch script are as follows:

    1. Run Oracle Export

    2. Copy the dump and log files to backup area

    3. Compress the backup to save space

    4. Clear out dump files


    Run Oracle Export
    The database version we have deployed in most of our sites is Oracle 10gR2 (10.2.0.4). We use Oracle's Datapump facility for exports instead of the classic Export which is more time-consuming and generates large sized dump files. A batch script is created for every Database instance. A parameter file mentioned in the batch file would contain all parameters for the Export.
    Batch file would be as follows:

    [Oracle Home]\bin\EXPDP   [system/pwd@db-name]   PARFILE=[full URL of Parameter file]


    The parameter file would look as follows:

    DIRECTORY=[Oracle Directory Name]
    DUMPFILE=[Export File Name].DMP
    LOGFILE=[Oracle Directory]:[Filename].LOG
    CONTENT=ALL
    SCHEMAS=[All the Schemas that need to be exported]


    Archiving the export
    Steps 2,3 and 4 are done using VBScript. For performing Zip operations we use 7-Zip as it provides a command-line interface. (Download here)
    The VBScript will do the following:

    1. Create a folder for current day of week.

    2. Copy the contents from Export area to current day's folder.

    3. Compress the files in current day's folder.

    4. Remove current day's folder.

    5. Remove export dump files from Export directory.


    The VBS file looks as follows:

    '-----------------------------------------------------------
    ' wsh script to create directory by day MON,TUE,....
    ' copy the backup into the respective Folders
    ' They will be Zipped and stored in the respective Folders
    '------------------------------------------------------------
    dim filestr, objFSO, dir, objfolder
    dim backup_ok
    dim sFiles, s7zpath, sStatement, sFileName
    ' msgbox weekday(date)
    select case weekday(date)
    case 1 filestr = "SUN"
    case 2 filestr = "MON"
    case 3 filestr = "TUE"
    case 4 filestr = "WED"
    case 5 filestr = "THU"
    case 6 filestr = "FRI"
    case 7 filestr = "SAT"
    case else msgbox "Not a valid day"
    end select

    backup_ok = "N"

    dir = "C:\TEMP"
    ' ----------------------------------------------------------------------
    ' Ensure the target directory Exists
    ' ----------------------------------------------------------------------
    src_dir = "C:\TEMP\TEST"
    Set objFSO = CreateObject("Scripting.FileSystemObject")
    If not objFSO.FolderExists(src_dir) Then
    wscript.echo "TARGET directory does not exist, Hence backup Not Created"
    End If
    todaydir = dir&"\"&filestr

    '-------------------------------------
    ' check whether folder exists
    '-------------------------------------
    Set objFSO = CreateObject("Scripting.FileSystemObject")
    If objFSO.FolderExists(todaydir) Then
    Set objFolder = objFSO.GetFolder(todaydir)
    ' Wscript.Echo "Folder existS."
    objFSO.DeleteFolder(todaydir), TRUE
    Else
    ' Wscript.Echo "Folder does not exist."
    rem -------------------------------------
    rem Create folder
    rem -------------------------------------
    Set objFSO = CreateObject("Scripting.FileSystemObject")
    Set objFolder = objFSO.CreateFolder(todaydir)
    ' Wscript.Echo "Folder Created"
    End If

    rem -------------------------------------
    rem Copy all files in the folder
    rem -------------------------------------
    ' wscript.echo todaydir

    Set objFSO = CreateObject("Scripting.FileSystemObject")
    objFSO.CopyFolder src_dir, todaydir , TRUE

    '-----------------------------------------
    ' Zip the contents of folder using 7-zip
    '-----------------------------------------
    sFiles = todaydir & "\*.*"
    s7zpath = """C:\Program Files\7-Zip\7z.exe"""
    sFileName = dir & "\" & filestr & "Day.zip"
    sStatement = s7zpath & " a -tzip -y " & sFileName & " " & sFiles
    'wscript.echo sStatement

    Set oShell = WScript.CreateObject("Wscript.Shell")
    '----------------------------------------------------------
    ' 0 - Hides the window and activates another window.
    ' true - script execution halts until the program finishes
    '----------------------------------------------------------
    oShell.Run sStatement, 2, true


    '-----------------------------------------
    ' Delete the contents of Temp Folder
    '-----------------------------------------
    Set objFSO = CreateObject("Scripting.FileSystemObject")
    if objFSO.FileExists(sFileName) then
    'wscript.echo "Deleting " & todaydir
    objFSO.DeleteFolder todaydir
    'else
    ' wscript.echo "Cannot locate " & sFileName
    end if

    '-----------------------------------------------------------------------
    ' Delete DMP Files
    '-----------------------------------------------------------------------
    Set objFSO = CreateObject("Scripting.FileSystemObject")
    For Each file In objfso.GetFolder(src_dir).Files
    if objFSO.GetExtensionName(file) = "DMP" then
    file.delete
    end if
    Next
    '-----------------------------------------------------------------------
    ' End of backup Script
    '=======================================================================

    Monday, December 7, 2009

    Using the /3gb switch

    All of our CES Installations are done on Windows servers (32-bit). Windows Servers, by default do not allow any process to utilise more than 2GB of memory in the RAM. With the maximum addressable space being 4GB for 32-bit OS, 2 GB is utilised by the Windows Kernel processes. Extended memory of upto 16GB can be used on the server and the extended memory is detected only by the Enterprise edition of Windows Server.
    Even though, upto 10GB of RAM is available to be utilised, default settings on windows do not allow the Oracle Database to acquire more than 2GB (irrespective of the Physical Address space defined). To allow the Oracle Database instance to acquire more than 3GB, we have to turn on the /3gb switch on the Operating System.

    In Windows 2003 Server
    In Windows 2003 Server (Enterprise Edition), the 3GB switch can be turned ON using the boot.ini file
    Note: The boot.ini file is available in the default drive (C:). You might have to show hidden and system files to view and edit the file.
    Open the boot.ini file and locate Operating System parameters.

    1. At the end of the parameter list, Add /3gb

      multi(0)disk(0)rdisk(0)partition(1)\WINDOWS="Microsoft Windows XP Professional" /fastdetect /usepmtimer /NoExecute=OptOut /3gb


    2. Save the boot.ini file

    3. Restart the Server for the changes to take effect


    For more about the /3gb switch on Windows 2003 Server, read this

    On Windows 2008 Server
    On the Windows 2008 Server (or Vista OS), the 3gb switch can be turned ON/OFF using the Boot Configuration Data Editor (BCDEdit). [Read more about BCD]
    To turn ON the 3GB Switch,

    1. Run the Command Prompt (cmd) as Administrator.

    2. Type

      bcdedit /set IncreaseUserVA 3072

      and press Enter

    3. 3072 = 3 * 1024 MB = 3GB
    4. Restart the Server

    5. Type bcdedit on command prompt to check the current value of IncreaseUserVA


    To Turn OFF the 3GB switch, type

    bcdedit /deletevalue IncreaseUserVA